Thursday, August 30, 2018

How to Replace a Low Voltage GE Switch & Relay [Install Tips]

Update your old GE switches with modern low voltage parts.


If you have a GE low voltage light system and one of the lights in your home isn't working, you'll either need to replace the switch or the relay that's connected to the switch.


First, use this guide to determine which part needs to be replaced:

(See our GE troubleshooting tips for additional help with your system if multiple lights throughout your home (or ALL the lights) aren't working.)

*Old vs New Switches & Compatible Brackets:

See the difference between an old switch & new switch:


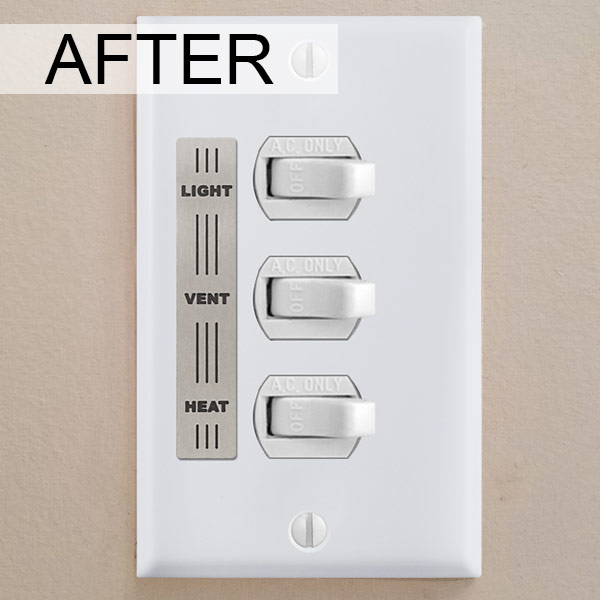
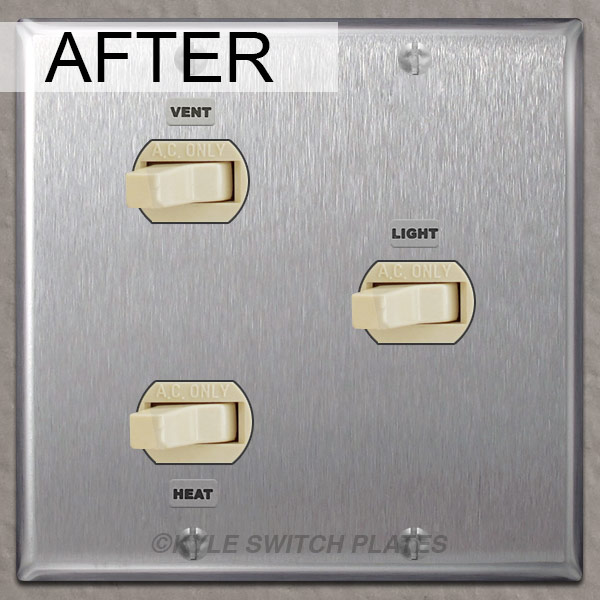
Here are some examples of old switches in old brackets.
New switches (with the black housing) should NOT be forced into these old rectangle brackets because the new switches are larger than the old ones.


If forced into an old bracket, the new switch can get pinched, malfunction and eventually burn out the connected relay.

New switches are only compatible with diamond brackets.
However, brackets aren't necessary when you purchase New Style Covers.

Replacing a Switch:

GE low voltage light switches have been updated since the 1950's.

The new switches have 2 square buttons - you press one side to turn the lights on and the other side to turn them off (instead of rocking the switch one way or the other to control the lights).

If you need to replace an original switch, you'll need to replace the cover plate (and any other switches in that plate) as well.

With Snap-In replacement covers for GE switches, you can install new switches without buying the new diamond-shaped brackets to mount them in the junction box.

The new switches snap into these cover plates, eliminating the need for a bracket.

Note: Snap-In New Style Covers are only available at:

Replacing a Relay:

Each switch is connected to it's own relay (unless two switches have been wired together to a single relay for 3-way functionality).

New GE relays can be purchased here. The two most common replacements are the RR7 and the RR9. Take a look at your old relay and pay attention to the number of wires coming out of the top.

If your old relay has 3 wires or is labeled as RR2, RR3 or RR5, you will replace it with the new RR7 relay.

If your old relay has 4 wires on top (one of which is for a pilot light - typically yellow) and is labeled with part numbers RR4, RR6 or RR8, your replacement will be the RR9 pilot light relay.

GE System Wiring Info:

Here is an overview of the wiring in an older home with a GE low voltage lighting system using an RR7 relay:


Back of GE low voltage switch:
The back of a new GE switch has prongs labeled 
"RED ON", "BLK OFF", and "COMMON."

TO REPLACE A SWITCH, use the quick connectors that come with the switches to connect:
the red wire (from the relay) to "RED ON" prong
the black wire (from the relay) to the "BLK OFF" prong
the white wire (coming from the transformer) to the "COMMON" prong


(For Pilot Light switches, there is an additional prong between the prongs for the black and red wires. Connect the yellow pilot light wire there.)

TO REPLACE AN OLD RELAY, connect the wires in the relay panel to the replacement relay as follows:
  • old red wire to new red wire
  • old black wire to new black wire
  • old white (or other color) wire to new blue wire

Where are these wires coming from?
As shown in the GE system diagram above:
The red wire runs from the relay to the "ON" terminal on the switch.
The black runs to the "OFF" terminal on the switch.
The blue connects to the system's rectifier.

The side of an RR7 relay has 2 brass screws, which are used to connect wires running to the circuit breaker and the lamps.

Look on the bottom of the relay, and under the screws you'll see 4 holes.


For a standard application, connect the circuit breaker wire into hole 1 or 2 on the bottom of the relay. Then connect the wire going to the lamp into hole 3 or 4.
If the same breaker is used to power multiple rooms (for example, your dining room & kitchen), you'll wire multiple relays together.


For the 2-relay setup shown above, the circuit breaker wire goes in the first hole of relay number 1.

Another wire connects the relays (from the second hole of relay one to the first hole of relay two (see diagram).

The lamps are wired to hole #3 of each respective relay.

These instructions do not cover all details or variations in equipment nor do they provide for every possible contingency that may be met in connection with the installation, maintenance or operation.

Information provided is subject to change without notice.

Kyle Switch Plates is not responsible for any errors or omissions.

Shop Replacement Parts for GE Low Voltage Lit Homes

Get a GE Wiring Diagram for all types of GE low voltage switches - free with any purchase on www.kyleswitchplates.com.

Other Examples of Old GE LoVo Switches:

Your vintage switch may look like any of these examples:

To replace switches from the top row (labeled "Standard Switches"), get new ge switches here. These switches go with the RR7 relay.

To replace switches in the bottom row, get new ge pilot light switches. These switches connect to RR9 Pilot Light relays.

Note, the locking RKS-6 and RKS-8 have key slots and require a key to turn the lights on and off. If you want to continue to use a key to adjust the lights, you can find replacements here:
Buy key switches for GE low voltage.
Buy pilot light key switches for GE low voltage.

Don't see your switch shown?

See all vintage GE switches & replacements for additional types of vintage switches.

OR, you may have another brand of low voltage system!

Check your relays to look for other brands such as Pyramid, Sierra, Touch Plate or Remcon. Use our Low Voltage System Identification Guide to help find your brand and replacement parts.

Wednesday, August 22, 2018

Replacement Covers for NuTone Light, Vent & Heat Switches [with labels]

If you're updating a bathroom and want to replace your dingy old NuTone light, vent and heat covers, we'll show you how.

Here are three examples of NuTone switches & covers commonly found in bathrooms:


1. Vent, Heat, Light & Night Light:

This nickel NuTone cover fits over 4 horizontal toggle switches that control the bathroom fan, lights and overhead heater.


Black imprinting labels each of the 4 switch functions.

Note that there are different switches shown in plate #1 and plate #2 above. The white switches in example 1 are larger than the ivory switches in example 2.

Example 1's switches are horizontal toggles and fit the same switch plate opening as a duplex outlet for 2 plugs. Learn more about horizontal toggle covers in our post here.


You can buy new covers for 4 horizontal toggles without labels printed on them. Choose from a variety of other finishes or get stainless steel to keep the same look as the original cover.

Note: this is the same cover that is used for electrical outlets.

To add labels to the switches, get adhesive NuTone switch labels and stick them to the plain cover plate.


NuTune switch labels are available in antique silver to match stainless steel plates, but also come in antique brass and can be added to covers in any finish.

The small metal rectangle labels are 3/8" high x 1/2" wide and come with a strong adhesive backing. Simply peel and stick to any wall plate.

This bathroom went through a recent update and the new switches & cover look great:


2. Double-Gang Vent & Heat:

Example #2 is a NuTone HS-94S with 2 stacked switches on the left (labeled VENT & HEAT), and a standard toggle light switch on the right.


Horizontal Toggles & Standard Toggle Light Switches

A replacement plate with no printed labels looks like this:


Vent and heat labels can be added to replacement covers.


3. Single-Gang Light, Vent, Heat:

Example #3 is a NuTone system with 3 stacked switches labeled LIGHT, VENT & HEAT.


These 3 small switches (despard switches) are sold individually and installed in a metal mounting bracket.

NuTone switches like these fit triple despard cover plates.


Since these replacement covers don't have labels, adhesive ones can be added to identify which switch does what.

One option, is to get these NuTone switch vent & heat labels, and stick them to the side of each switch. (These are the same stick-on labels from example one, but in the brass finish.)

Satin brass cover shown with ivory switches and antique brass labels.

Another option is to add this peel-and-stick label for NuTone switches. Which is what this homeowner chose when doing renovations to a basement bathroom.


You can add light switch labels to the left or right of despard style switches.

4. Light Vent Heat (2-Gang Scovill)


Here are the NuTone Scovill switches without the cover:


Note that the switches are in a large square metal strap with 4 screws holding it into the junction box. The screw holes for attaching the cover plate are in the center of the left and right edges of the mounting strap.

If you only need to replace the cover, you get this NuTone Scovill Light Vent Heat Switch Cover.


You can see that the cover (available in ivory and white) doesn't label the switches. You can adhere these light vent heat switch labels to the front of the new plate. Or, create your own method for labeling them.


If you need to replace the switches (despard switches like these), you'll mount them in new metal straps, and the cover plate will be slightly different.

Below, you can see the new despard switch straps hold switches for a single gang, or single slot in the junction box.

The cover plate screws into these straps at the very top and bottom:


You'll mount the switch on the right in the center of the strap, rather than up at the top. You'll need this new cover plate if updating your switches and straps.
This cover is available in stainless steel (shown), polished chrome, white, ivory, satin brass & black. Kyle Switch Plate's light vent heat labels for NuTone covers can be added either above or below each switch.


Thursday, August 16, 2018

Stainless Steel Wall Plates - Residential vs Commercial Grade

What is the difference between the two stainless steel finishes labeled as "302" and "430"?

When selecting a finish for a wall plate, some customers get tripped up by the 2 stainless steel options we offer on our website.

As you can see, they look the same:


So how are they different?

The simplest answer is that the 302 finish is a thicker specification grade steel (for commercial or industrial use) with a greater corrosion resistance, while the 430 finish is residential grade steel used in homes, condos & apartments.

Features of 302 Stainless Steel Cover Plates:

  • .035 gauge steel
  • non-magnetic
  • corrosion-resistant steel (CRES)
  • doesn't stain, rust or corrode as easily as ordinary steel (not stain-proof)
  • more expensive (than 420 Residential Grade)
  • 302 stainless steel (US #32D)
  • satin brushed finish
  • 70+ sizes available


Best For:

  • hospitals
  • restaurants
  • industrial facilities
  • government offices
  • computer systems
  • food processors
  • schools
  • facilities that must meet federal fire & safety requirements
  • public institutions requiring superior grade switch plates


Features of 430 Stainless Steel Covers:

  • .030 gauge steel
  • less expensive (than 302 Spec Grade)
  • satin brushed finish
  • 430 stainless steel (US #32)
  • 883C listed with UL number E3078
  • meets Federal Specification WP4554A
  • most sizes available (250+)

Best For:

  • residential use

Our most popular sellers between the satin steel finishes are the 430 stainless. They are available in more sizes/configurations and are less expensive.

Shop 430 Stainless Steel Cover Plates for Residential Use


The perfect finish for kitchens with stainless steel appliances, as well as spaces featuring industrial style or modern farmhouse decor.

Shown: close-up of satin stainless steel finish.